Interactions tutorial
On this page, we’ll explore interactions and state by building a simple FAQ website. You should already have a basic understanding of how to use Plasmic Studio. You can follow along in this project or start your own fresh project.
Connecting state to UI
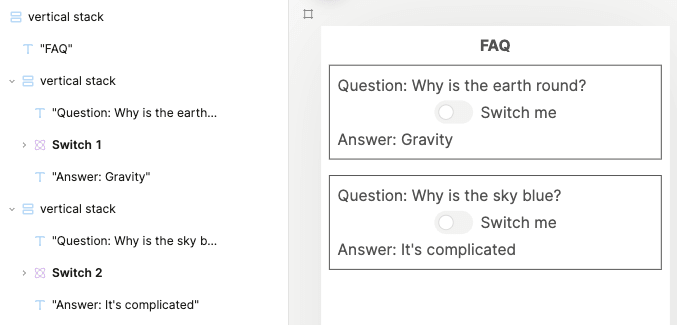
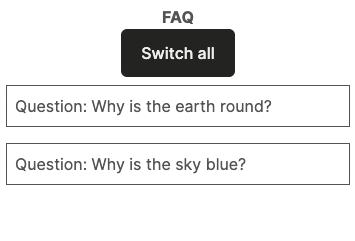
Connecting state to UI is the first step to adding interactivity. Let’s start our FAQ website by adding two questions and answers. Try to build a page similar to this:
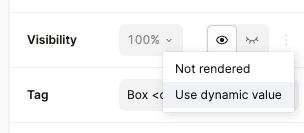
The page is functional but not interactive yet. We want the answer text to only show when the switch is on. We can achieve this by connecting our answer texts’ visibility to our switches’ state. Select the first answer text and, on the right panel, find the “Visibility” section. Click the three dots and click “Use dynamic value”.
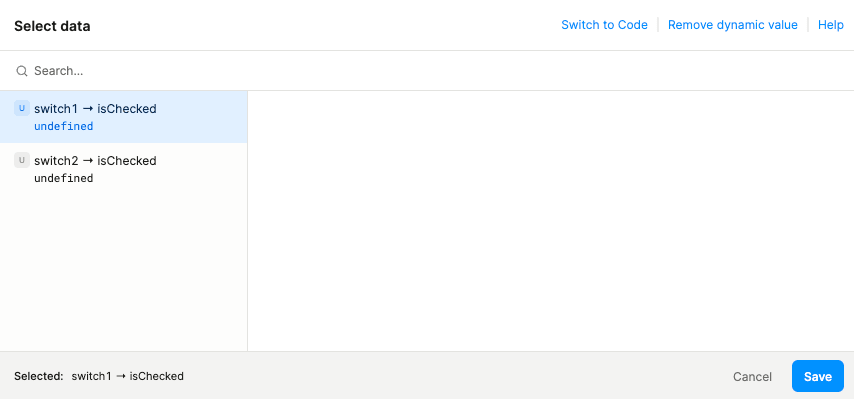
A data picker with the list of available state variables should pop up.
Select switch1 → isChecked (you might need to rename your switch “Switch 1” first) and click “Save”.
Here, switch1 refers to your switch’s name, and isChecked is the name of the switch’s state variable.
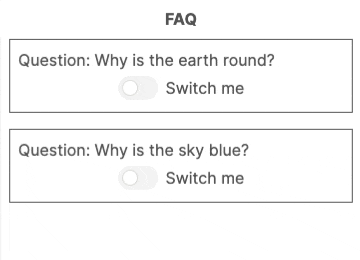
Do the same for the other answer text. You should no longer see the answers on the canvas because the switches are off. Preview your project and fiddle around with the switches!
Adding interactions to update state
Our users are complaining about needing to click each individual switch now.
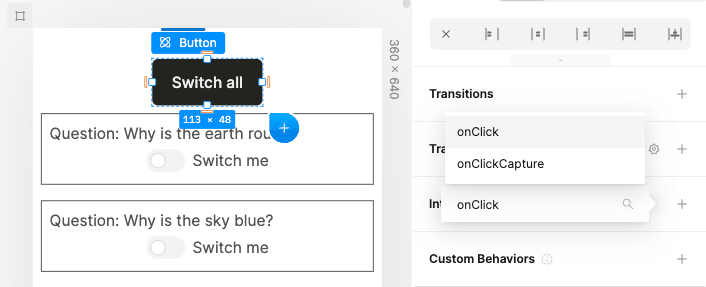
Let’s add a button that turns on all the switches together.
Select the button and, on the right panel, find the “Interactions” section.
Add a new onClick interaction.
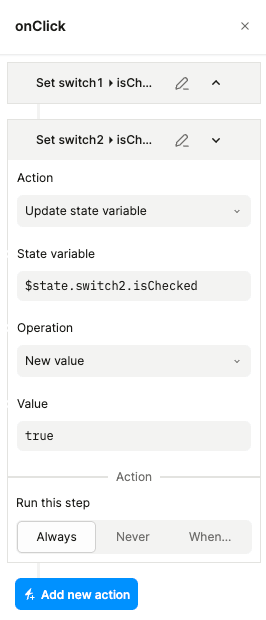
A dialog for customizing your interaction should pop up. Fill out the form like so:
- Action: Update state variable
- State variable:
switch1 → isChecked - Operation: New value
- Value:
true(this means the switch is on,falsemeans the switch is off)
Then, click “Add new action” and do the same for the second switch.
Close the dialog, and test out your new feature!
Adding state variables
In the above scenarios, we’ve been using state variables from built-in components. Sometimes you can’t rely on built-in components. What if we wanted to remove the switches and allow users to click anywhere in the question box?
To solve this, we’ll need to add state variables to our page.
Click on any element and, on the right panel, under your page name, click the expand button to show your page settings.
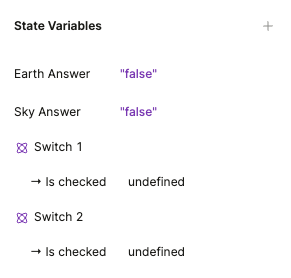
Find the “State variables” section and expand it.
You should see your two switch states here.
Add two new state variables.
You choose the names, but make sure to set the type to “Boolean” (a data type that can either be true or false).
We can’t delete the switches yet because they’re still being referenced by our answer texts (go ahead and try). Let’s select our answer texts and update their visibility now.
Since the answer texts are hidden, it’s impossible to select them from the canvas. One way is to select the switch first and toggle the “Is checked” variant to reveal the answer text. A quicker way is to use the left panel’s outline tab.
Either way, select each answer text, find the “Visibility” section, and update the dynamic value to your newly created state variables.

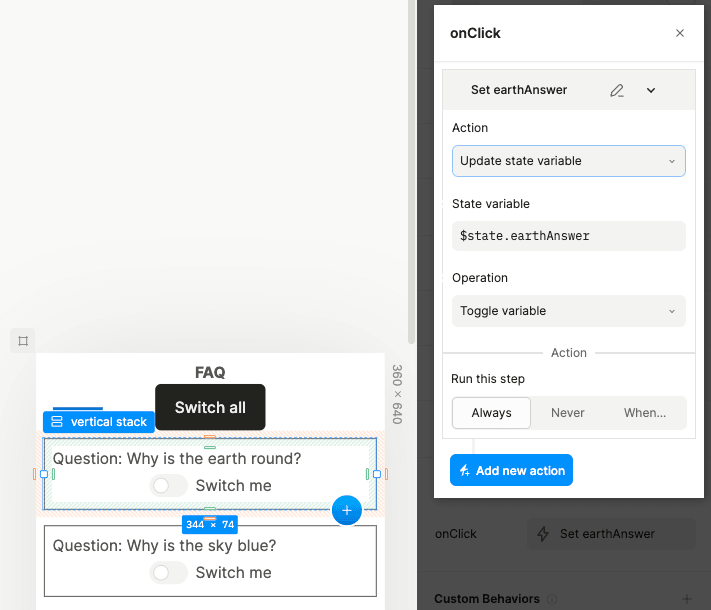
Now we need to update the state variables.
Select each stack and add a new onClick interaction just like we did earlier for the button.
Choose the corresponding state variable and change the operation to “Toggle variable” (this toggles a boolean variable back-and-forth between true and false).
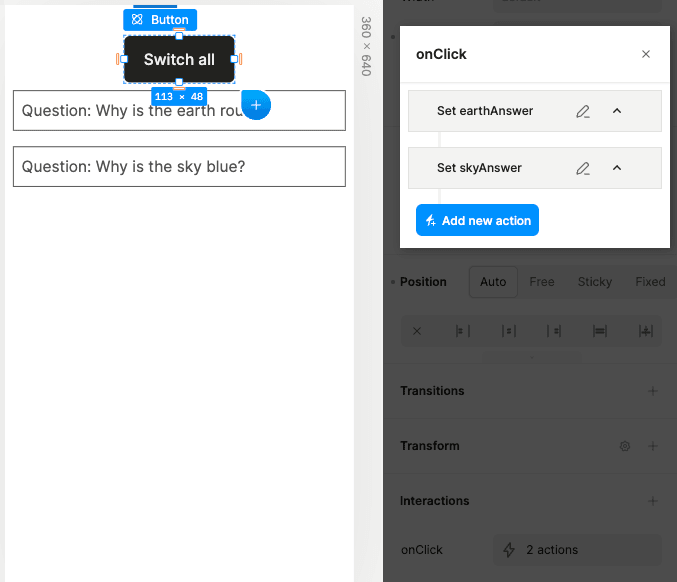
Finally, let’s update the switch all button.
Select the button, find the “Interactions” section, and click the existing onClick interaction which should show “2 actions”.
Edit each action, replacing the switch variables with your new state variables.
Since the switch variables are no longer being used, we can finally delete the switches.
Extra credit: Select each stack, on the right panel, find “Effects” and set “Cursor” to something that feels clickable.
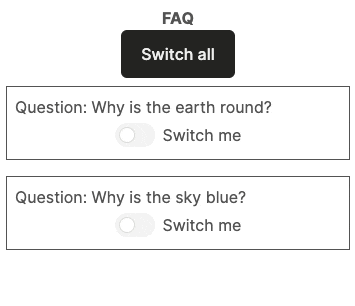
Here’s the final FAQ website!
Next steps
You’ve learned the basics of interactions!
- Try to convert each FAQ section into a stateful component.
- Dive deeper into interactions and state.
- Learn more about dynamic values.