Use with localization frameworks
Plasmic supports integration with popular localization frameworks like Lingui, or react-i18next.
This works with both codegen and the Headless API.
If you’d like to start with a code example, check out the following examples on GitHub:
This feature is only available for organizations on the Growth or Enterprise tiers.
Steps
1. Update your code to use the localization framework
First, you would need to tell Plasmic how it should generate the localization strings. There are two parameters that you can set:
{keyScheme: 'content' | 'hash' | 'path',tagPrefix?: string,}
-
keyScheme: How Plasmic generates message keys, one of the following:-
content: Use the message text itself as the key (simple, but key changes when text changes). -
hash: Use a stable hash of the message text (compact, avoids special characters). -
path: Use a hierarchical path (project/component/element/variants), independent of the text.
-
-
tagPrefix(optional): For rich text, Plasmic emits tags like<0>…</0>. Some frameworks (e.g., react-intl) require non-numeric tag names. Set tagPrefix (e.g.,"n") to get<n0>…</n0>. This parameter is required forreact-intl.
Let’s say you want to use the content key scheme and n as the tag prefix. You can set it like this:
// plasmic-init.tsexport const PLASMIC = initPlasmicLoader({projects: [{ id: 'YOUR_PROJECT_ID', token: 'YOUR_PROJECT_API_TOKEN' }],i18n: {keyScheme: 'content',tagPrefix: 'n'}});
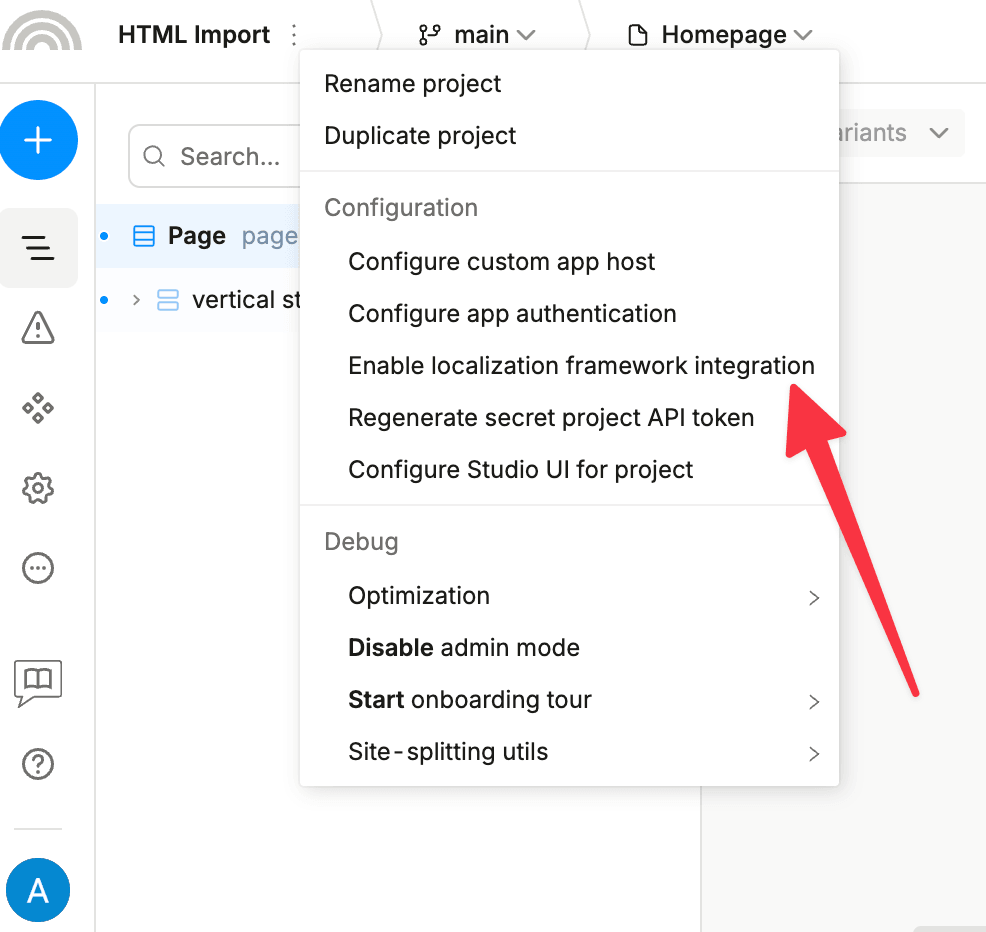
2. Enable localization in your project
Second, open the project you want to test. Click on the ellipsis menu by the name of the project on the top-left corner, and select “Enable localization for this project” and press Confirm. Turning it on will effectively change codegen to wrap all text blocks in a wrapper component for localization.
(Notice it doesn’t affect previously published versions of the project.)
3. Provide a translation function
Next, you need to define a translation function that uses your localization framework to translate text. The translation function takes in two arguments:
key: The key of the text to be translated.opts: Additional options. Specifically:opts.components: a dictionary of string to React elements. This is only passed in for rich text, where the text includes other React elements.
The translation function should then return the translated string or React element.
For example, your translation function may be called like this:
// returns translated string in current localetranslator('Hello world');// returns the translated string as a React element, with `<em/>` applied// where `<1/>` is.translator('Hello <1>cruel</1> world!', { components: { '1': <em /> } });
Once you have your translation function defined, you need to pass it to PlasmicRootProvider so that Plasmic content can access it:
<PlasmicRootProvider translator={translator}>...</PlasmicRootProvider>
How you define your translation function depends on the localization framework that you are using, but each should give you a way of translating either a plain string or rich text. Here are a few examples:
lingui
import { i18n } from '@lingui/core';import { Trans, I18nProvider } from '@lingui/react';// Can be defined anywhere, and passed as translator prop// to PlasmicRootProviderconst translator: PlasmicTranslator = (key, opts) => {if (opts?.components) {return <Trans id={key} components={opts.components} />;} else {return i18n._(key);}};
See also the Lingui example on GitHub.
react-i18next
Note: passing in an object of components requires version 11.6.0!
import { Trans, useTranslation } from 'next-i18next';// Defined as a hook; should be used and passed as translator// prop to PlasmicRootProviderfunction usePlasmicTranslator() {const { t } = useTranslation();const translator: PlasmicTranslator = (key, opts) => {if (opts?.components) {return <Trans i18nKey={key} components={opts.components as Record<string, React.ReactElement>} />;} else {return t(key);}};return translator;}
See also the i18next example on GitHub.
react-intl
When Plasmic generates localization strings for rich text, it uses numbers as tag names to demarcate markup — for example, Hello <0>world</0>!. However, react-intl requires these tag names to start with a letter and not a number. So you will need to post-process the localization files generated by Plasmic, and prepend each number with a letter (say, n). You should do this as part of your build pipeline.
Here’s a code snippet for your convenience for prepending the letter n in front of each numerical tag:
export const processMessage = (x: string) => {return x.replace(/<(\/?)(\d+)>/g, '<$1n$2>');};
Then, you can use useIntl() to build your PlasmicTranslator function:
import { useIntl } from 'react-intl';// Defined as a hook. Should be called, and the result passed as translator// prop to PlasmicRootProviderfunction usePlasmicTranslator() {const intl = useIntl();const translator: PlasmicTranslator = (key, opts) => {return intl.formatMessage({ id: key },opts.components &&Object.fromEntries(Object.entries(opts.components).map(([tag, elt]) => [`n${tag}`, // convert this numeric tag to something starting with a letter(chunks) => React.cloneElement(elt, { children: chunks })])));};return translator;}
4. Generate strings for translators’ workflow
Next, you need to export all localizable strings from your Plasmic project. To do so, you need to install the Plasmic cli:
npm install -g @plasmicapp/cli# or: yarn global add @plasmicapp/cli
You will also need to log into the cli so Plasmic knows who you are:
plasmic auth
To generate all possible messages, use the localization-strings command:
# Outputs localizable strings from PROJECTID to a po fileplasmic localization-strings --projects PROJECTID --format po -o locale/en/plasmic_messages.po
You can generate your localized strings in different file formats:
--format po: The portable object format--format json: JSON format mapping message key to its default message--format lingui: the Lingui format
You can now merge this file with your other localization dictionaries in your app, and have them translated via your usual translation workflow.
5. Provide localized strings via your localization frameworks
Finally, you just need to provide the localized strings to your React app, using whatever mechanism is exposed by your localization framework. Plasmic components will then be calling your translation function while rendering localizable content, and your translation function will be tapping into your framework to return the localized strings.
6. Enabling localization preview in Studio (optional)
Previewing translations in Studio should work out of the box in the codegen mode.
If you want translations to work in preview using loader mode you would need to add some changes to your plasmic-host page in order to pass the localization context to the Studio:
// plasmic-host.tsximport * as React from 'react';import { PLASMIC } from '@/plasmic-init';import { PlasmicCanvasHost, PlasmicTranslatorContext } from '@plasmicapp/loader-nextjs';import { usePlasmicTranslator } from '@/i18n';import { serverSideTranslations } from 'next-i18next/serverSideTranslations';import type { GetStaticProps } from 'next';const PlasmicHost = () => {const translator = usePlasmicTranslator();return (PLASMIC && (<PlasmicTranslatorContext.Provider value={translator}><PlasmicCanvasHost /></PlasmicTranslatorContext.Provider>));};export const getStaticProps: GetStaticProps = async (context) => {const i18nProps = await serverSideTranslations(context.locale ?? 'en');return { props: { ...i18nProps } };};export default PlasmicHost;
Optionally, you can add a button to switch between the languages, which would only be available in the Studio preview mode:
// plasmic-host.tsx...import { useRouter } from 'next/router';const PlasmicHost = () => {const translator = usePlasmicTranslator();const router = useRouter();const { locale } = router;const changeLanguage = () => {const newLocale = locale === 'en' ? 'es' : 'en';router.push(router.asPath, router.asPath, { locale: newLocale });};return PLASMIC && (<PlasmicTranslatorContext.Providervalue={translator}><button onClick={changeLanguage}>Change language to {locale === 'en' ? 'Spanish' : 'English'}</button><PlasmicCanvasHost />...
Background on localization frameworks
The three top localization frameworks are:
- react-i18next: https://react.i18next.com/
- react-intl: https://formatjs.io/docs/react-intl/
- lingui: https://lingui.js.org/
react-i18next is the most popular: https://www.npmtrends.com/react-i18next-vs-react-intl-vs-@lingui/react
They mostly work the “same” way:
- At run time, some global provider provides a big dictionary of key to translated string for the current locale.
- In code, localizable strings are wrapped in some function or React component.
- At run time, these functions or components use the global dictionary to look up and output the translated string.
- There are some extraction tools that can extract the localizable strings from source code by looking for their special wrapper functions and components. Some do rather extensive code transformations as well.
- There are some schemes for localizing for plurals, dates, and numbers as well.
These “translation function / components” (often called t() and <Trans/>) therefore serve at least two purposes:
- At build time, extracting strings that are translatable. The functions must receive the string key, as well as the “default” string value (say, english). If a string key is omitted, the default string value is often just used as the key.
- At run time, swapping in the localized strings. The functions must receive the string key, as well as any run-time values for interpolation or figuring out which plural form to use, etc. Note that the “default string value” is not needed at run time, as the dictionary is used, and including the default string value here would be a waste; some frameworks (like lingui) therefore may transform the source files and exclude the default string values at build time.
How localization happens with Plasmic
Localizable strings can currently show up as rendered React elements. These are text elements in Plasmic designs.
In the last section we described there being both build-time and run-time steps to localization. But for Plasmic, there is no “build time” step; instead, the plasmic localization-strings command generates all the localizable strings for you.
Once strings are translated, the localized strings can just be provided to your React app the same way your framework always does, and Plasmic content will be localized the same way as the rest of your site.