New Plasmic codebase (in-app)
Overview
In this tutorial, we’ll use the Plasmic Studio app to create a new Plasmic-powered website, with code synced to a new GitHub repository.
Looking for other quickstart options? Check out our developer quickstart page.
Steps
Create your first Plasmic project
First, log into Plasmic and click on the “New Project” button to create a new project. For now, choose to start with the “Simple Light Landing Page” template.
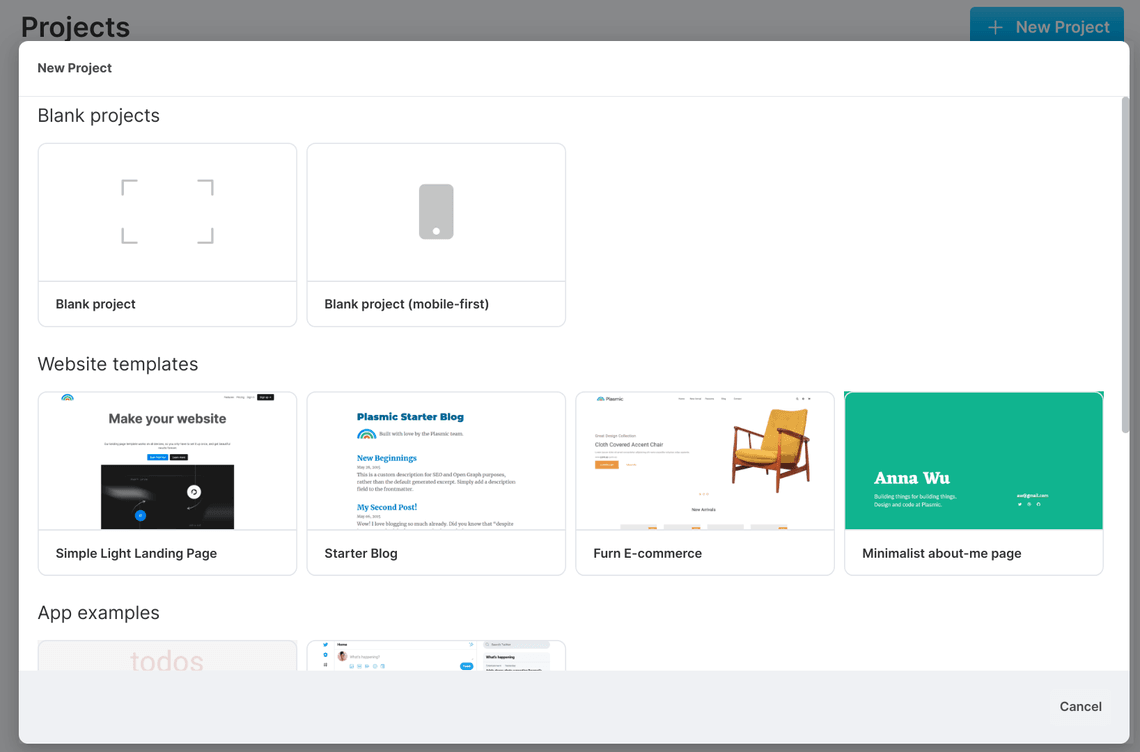
Feel free to click around and get a feel for how this template site is designed.
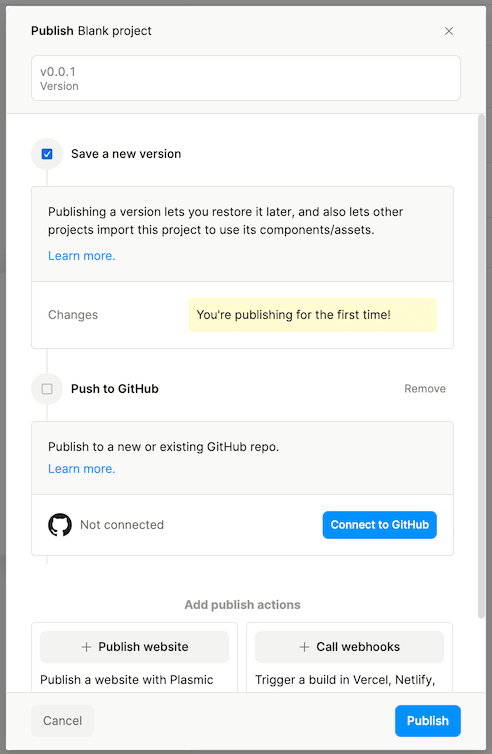
Link to your GitHub account
Click on the Publish button on the upper-right, and click on the “Connect to GitHub” button. Log in with your GitHub credentials.
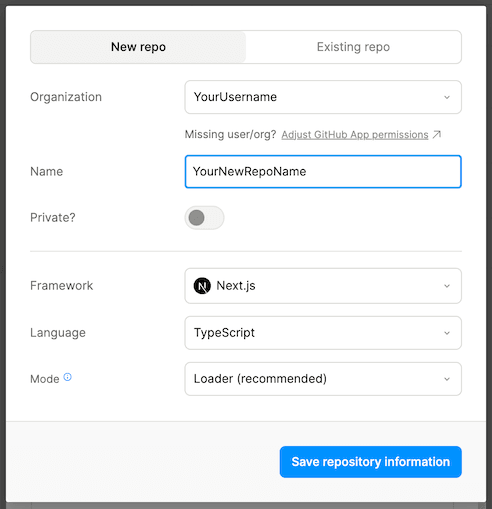
Configure your repo
Fill in the details of the new repo to create, including:
- Name of your repo
- Framework — Choose from Next.js, Gatsby, or plain React. For other frameworks, see the general quickstart.
- Language — JavaScript or TypeScript. We recommend using Typescript for the best developer experience.
- Mode — Choose Headless API (Loader) or Codegen. Learn more about the differences here.
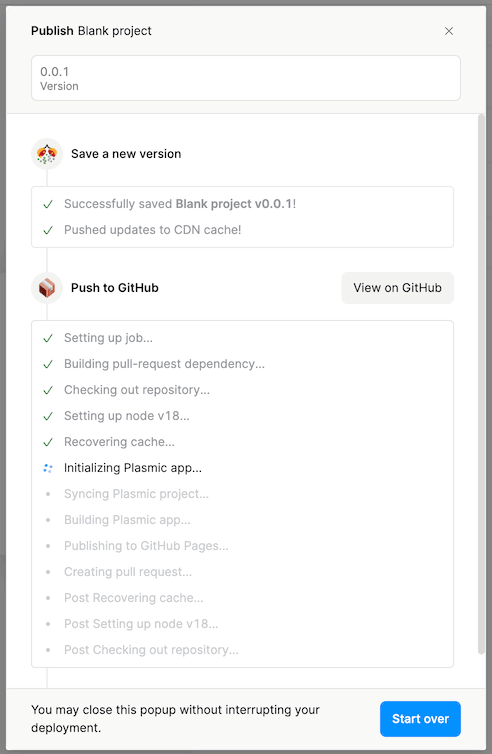
Push to GitHub
Go ahead and start the push!
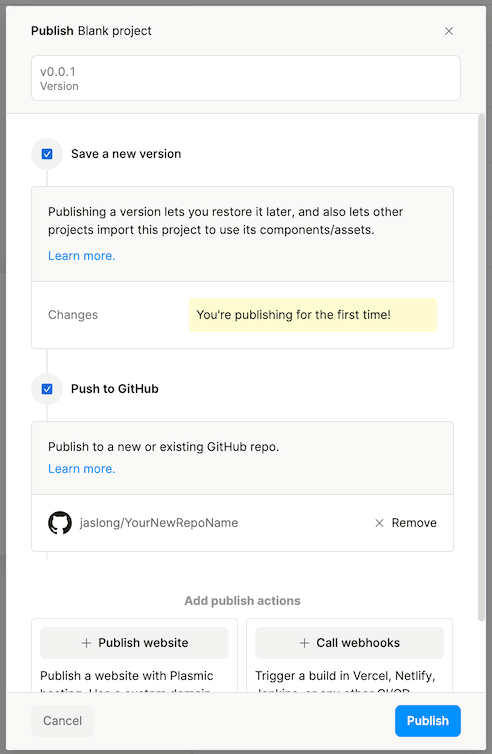
It might take a few minutes.
Clone from GitHub
Now let’s check out your new codebase and install the required dependencies.
git clone git@github.com:<github-username>/<repo-name>.gitcd <repo-name>npm install# oryarn
Local Development
We’ll want a local development server for tight iteration loops.
Let’s start your dev server (make sure you’ve run cd into your new directory).
npm run dev# oryarn dev
Your dev server will be running at http://localhost:3000 by default.
Sync updated Plasmic designs
Plasmic is powerful, not because of a one-time export of your design to code, but because Plasmic designs are your source-of-truth that go to production. Your new codebase comes with tools to automatically sync updates from Plasmic Studio.
As part of the dev server, the Plasmic loader plugin will automatically watch for and sync your Plasmic components into your dev environment. This usually happens in the background so you don’t have to worry about it.
Try making some changes in your Plasmic project, and see them show up on your dev server!
Next Steps
Thank you for checking out Plasmic! Here are some recommended next steps:
- Try deploying your new website! Read our documentation about deployments.
- If you’re using the Headless API (Loader), check out framework-specific instructions for Next.js, Gatsby, and Plain React.
- If you’re using Codegen, check out getting started with codegen.
- To learn how to use Plasmic Studio, play Plasmic Levels.
- To interactively explore the API of your generated components, click on the “Code” toolbar button in the project in Plasmic Studio.
- Join our community forum.