Get started with TanStack
You must first create a project in Plasmic.
To view this quickstart with all the IDs and token placeholders replaced with real values, open your project in Plasmic Studio and press the “Code” button in the top toolbar.
Overview
This covers integrating Plasmic into your existing TanStack codebase.
Want to quickly generate a new codebase with Plasmic already integrated? Use create-plasmic-app instead.
TanStack integration currently only supports the Codegen pattern.
Installation
npm install @plasmicapp/react-web# or yarn add @plasmicapp/react-web
Initialization
First install the Plasmic CLI:
yarn global add @plasmicapp/cli# or: npm install -g @plasmicapp/cli
Then from your project root dir, initialize plasmic.json and install our small runtime library with:
plasmic init
It will prompt you to paste your API token.
To find your project’s ID and public API token: open the project in Plasmic Studio.
The project ID is in the URL, like: https://studio.plasmic.app/projects/PROJECTID.
The public API token can be found by clicking the Code toolbar button.
Setup
First we would need to add the plasmic-host route:
// src/routes/plasmic-host.tsximport { createFileRoute } from '@tanstack/react-router';import { PlasmicCanvasHost, registerComponent } from '@plasmicapp/react-web/lib/host';export const Route = createFileRoute('/plasmic-host')({component: PlasmicHostRouteComponent});function PlasmicHostRouteComponent() {return <PlasmicCanvasHost />;}
Then we need to modify the src/routes/__root.tsx file to add the PlasmicRootProvider:
// src/routes/__root.tsximport { createRootRoute, HeadContent, Outlet, Scripts } from '@tanstack/react-router';import { TanStackRouterDevtools } from '@tanstack/react-router-devtools';import { PlasmicRootProvider } from '@plasmicapp/react-web';import appCss from '../styles.css?url';export const Route = createRootRoute({head: () => ({links: [{rel: 'stylesheet',href: appCss}]}),component: () => (<RootDocument><PlasmicRootProvider><Outlet /><TanStackRouterDevtools /></PlasmicRootProvider></RootDocument>)});function RootDocument({ children }: { children: React.ReactNode }) {return (<html lang="en"><head><HeadContent /></head><body>{children}<Scripts /></body></html>);}
And lastly, we need to update the app.config.ts:
// app.config.tsimport { defineConfig } from '@tanstack/react-start/config';import viteTsConfigPaths from 'vite-tsconfig-paths';import tailwindcss from '@tailwindcss/vite';export default defineConfig({tsr: {appDirectory: 'src'},vite: {plugins: [viteTsConfigPaths({projects: ['./tsconfig.json']}),tailwindcss()],ssr: {noExternal: ['@plasmicapp/data-sources','@plasmicapp/data-sources-context','@plasmicapp/prepass','@plasmicapp/query','@plasmicapp/react-web']}}});
Adding custom code components
Let your Plasmic Studio users drag/drop and visually manipulate your own custom React components! Learn more.
Step 1
Create a simple example React component:
import * as React from 'react';export interface HelloWorldProps {children?: React.ReactNode;className?: string;verbose?: boolean;}export function HelloWorld({ children, className, verbose }: HelloWorldProps) {return (<div className={className} style={{ padding: '20px' }}><p>Hello there! {verbose && 'Really nice to meet you!'}</p><div>{children}</div></div>);}
Step 2
Make sure you followed all of the steps in the Setup section above.
Step 3
Update your app host page at src/routes/plasmic-host.tsx to register your code components:
import { createFileRoute } from '@tanstack/react-router';import { PlasmicCanvasHost, registerComponent } from '@plasmicapp/react-web/lib/host';import { HelloWorld } from '@/components/HelloWorld';export const Route = createFileRoute('/plasmic-host')({component: PlasmicHostRouteComponent});registerComponent(HelloWorld, {name: 'HelloWorld',props: {verbose: 'boolean',children: 'slot'}});function PlasmicHostRouteComponent() {return <PlasmicCanvasHost />;}
Step 4
Start your app:
npm run dev
And check that you see a confirmation message at http://localhost:3000/plasmic-host .
Step 5
Open https://studio.plasmic.app, click the menu for the current project, select “Configure project,” and set it to http://localhost:3000/plasmic-host .

Step 6
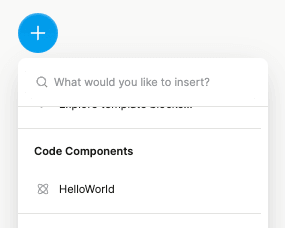
Re-open this project (or reload this tab) to see your component listed in the insert menu!
Later, after you deploy the route to production, update the project to use your production host URL instead,
such as https://my-app.com/plasmic-host.
This way, other members of your team
(who can’t access your localhost dev server) will be able to open and edit the project in
Plasmic.
(Again, the /plasmic-host route itself is a special hidden route not meant for humans to visit; it is only for Plasmic Studio to hook into.)
There’s much more to explore!
For example:
- Explore what you can do with code components.
- Render different variants of your pages/components.
- Override the content or props in your design.
- Add hooks for state and behavior to any component.
- (Advanced) Use Plasmic as a UI builder for developers.
Continue learning in the full docs.