Webhooks
See deployments and automation for high-level information about how and when to use webhooks.
Overview
Plasmic can automatically call webhooks when an editor publishes a project. You can use webhooks for a wide variety of automation use cases, such as publishing directly to production.
Webhook configuration
The webhooks publish action can trigger any number of webhooks. Each webhook can be configured in the following ways:
- HTTP method
- URL
- Headers (optional)
- Payload (optional)
Deploy on publish using Vercel webhooks
You need a Vercel account, and a GitHub repository with a Plasmic project connected to it. You can also use other hosting providers that support webhooks, but the steps will differ.
To deploy your Plasmic project on publish, you can set up a webhook to trigger a Vercel deployment.
- In your Vercel project, go to Settings > Git, scroll down to Deploy Hooks section.
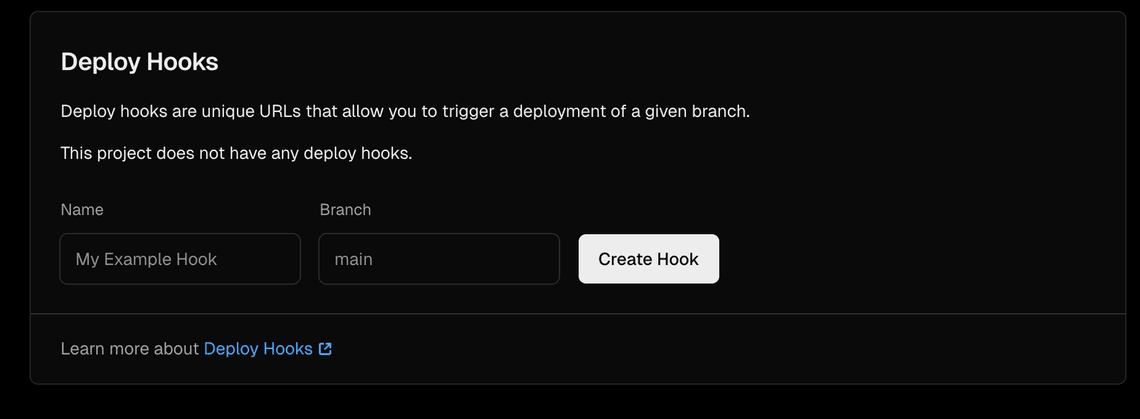
-
Enter a name for your webhook (e.g., “Plasmic Deploy”), a main branch name (the branch you want to publish, usually main or master) and click Create Hook.
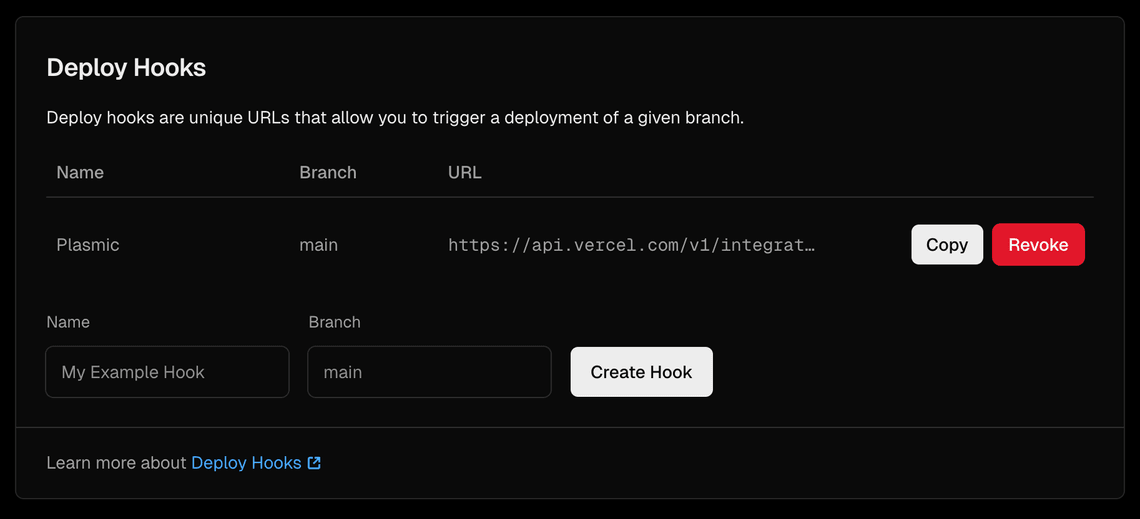
-
Click the “Copy” button to copy the webhook URL.
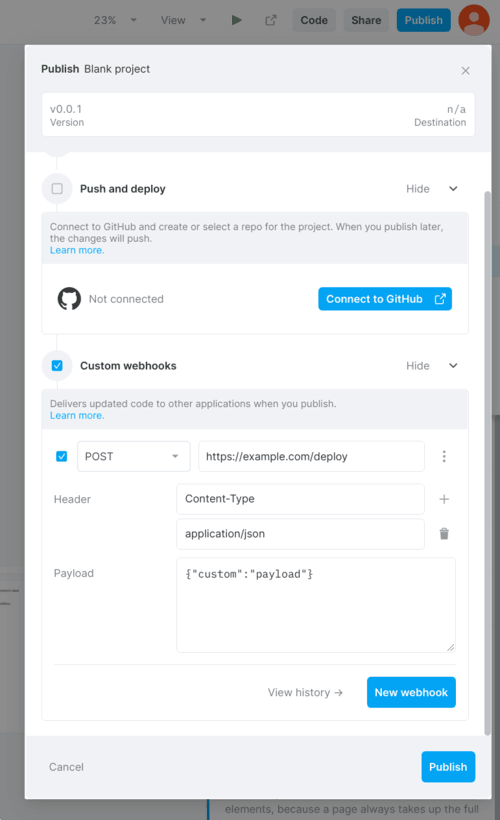
- In Plasmic Studio, open the Publish dialog, and click the Call Webhooks button.
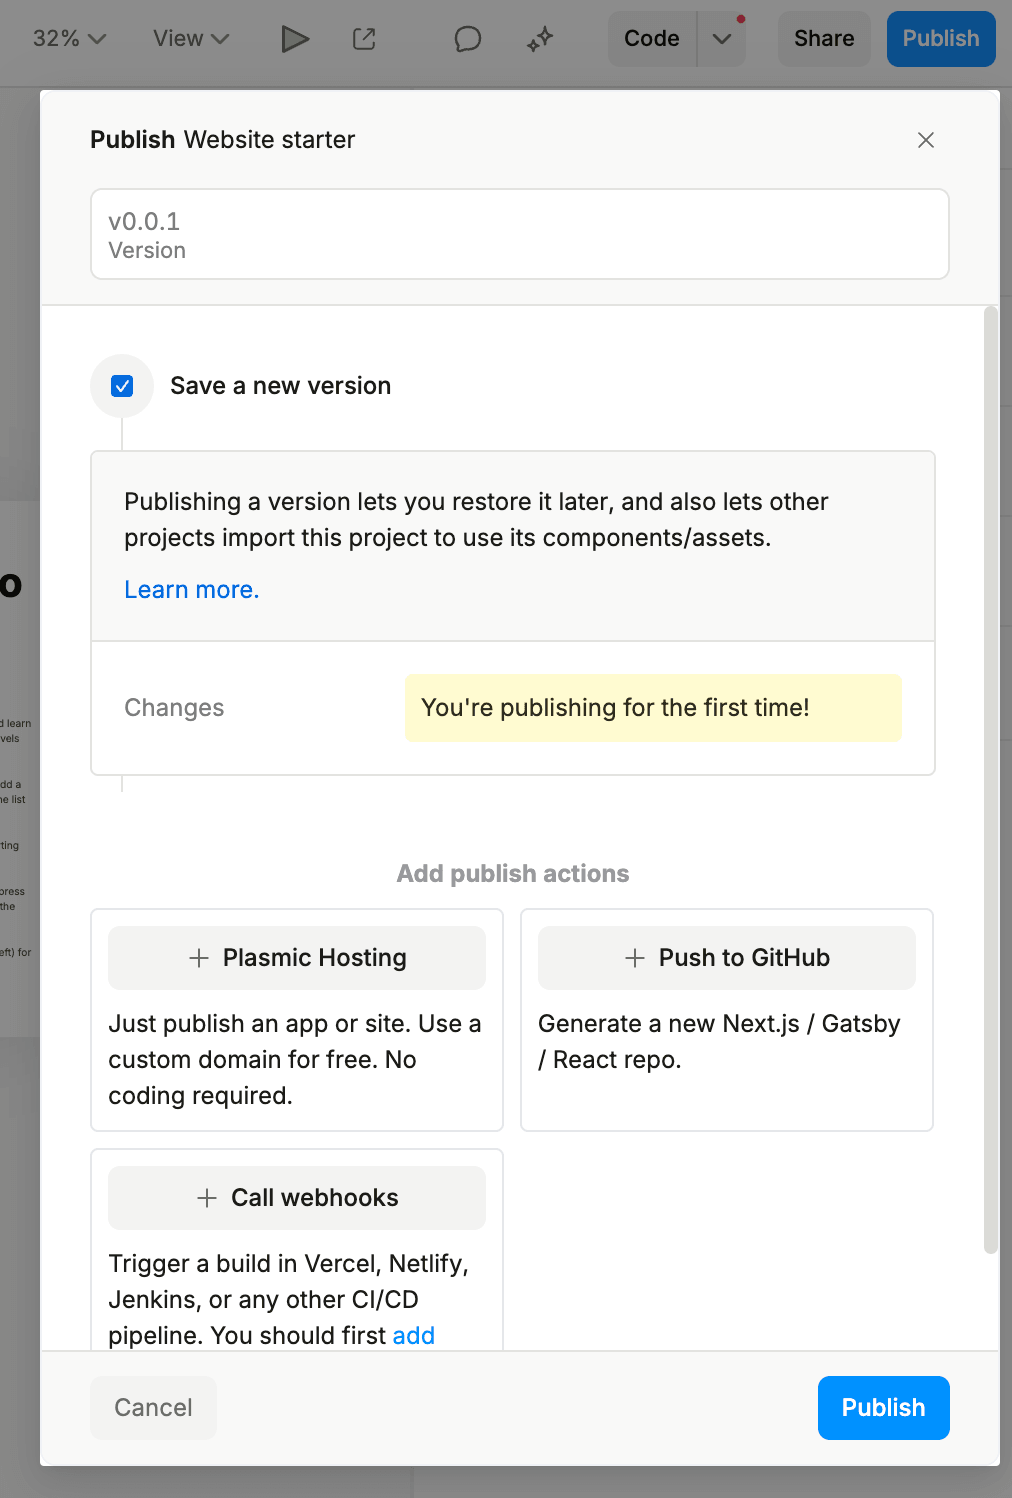
- Click the New webhook button, and paste the Vercel webhook URL you copied earlier.
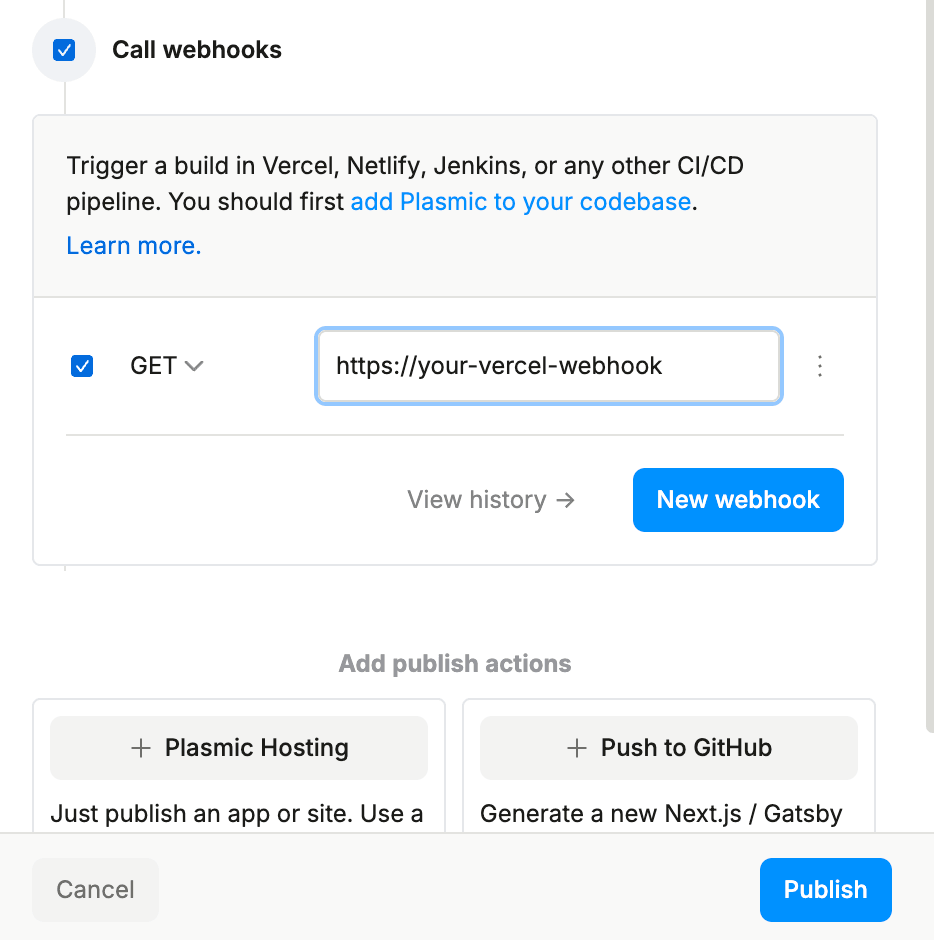
- Hit the Publish button, and you should see a new deployment created in Vercel.
Advanced
Include list of changed pages on publish
In order to optimize your CI/CD pipeline and avoid unnecessary builds, you can configure Plasmic to include a list of changed pages in the webhook payload. You can enable this option within the Publish → Call webhooks → Add a webhook → Show advanced options → Send Data.
When you create a new published version, the hook will include a payload like this:
{payload: string;importedProjectsChanged: string[];pagesChanged: string[];}
Here is a quick breakdown of what each field means:
-
importedProjectsChanged— If any of your shared libraries or imported projects were updated, you’ll see them here. Because changes in a dependency can affect every page that uses it, we recommend you revalidate all pages whenever this array is non-empty. -
pagesChanged— This is the list of pages we detected as changed. Use it to trigger targeted revalidation—only rerun those in your CDN or cache. -
payload- data you specified in your Payload field
Deploying without publishing
When an editor publishes a project, Plasmic defaults to saving a new version and triggers all publish actions (typically deploying to production). But sometimes you need to test something in a production-like environment without actually deploying it. Here’s one way to set this up:
- In your code, make the staging environment render the preview of your project.
For instance, if you use an environment variable
DEPLOY_ENVIRONMENT=staging:const PLASMIC = initPlasmicLoader({projects: [/*...*/],preview: process.env.DEPLOY_ENVIRONMENT === 'staging'}); - Add a webhook (separate from the existing webhook that triggers production) to trigger a staging environment build.
From now on, editors can publish to staging like this:
- Click the top-right “Publish” button to open the publish dialog.
- Uncheck the “Save a version” checkbox. This prevents any subsequent production builds from accidentally fetching the latest changes.
- Check only the webhook for publishing to staging.
- Click “Publish”.