Using custom fonts
Plasmic comes with hundreds of fonts ready-to-use from Google Fonts. If you still need to use a custom font, read on.
Using a font from a font delivery service
If the font is hosted on a font delivery service, such as Font Library, you can install the font in Plasmic Studio without code.
Anywhere in Plasmic Studio, click the insert button (keyboard shortcut: Q), search for “Custom CSS Embed”, and install it. This is a feature that allows you to embed arbitrary CSS on your pages, which is required for installing custom fonts.
On the left sidebar, click “Project Settings”, then click “Embed CSS”. In the editor, add a line like this to import the custom font:
@import url('https://fontlibrary.org/face/uglytypist');
Then, on the left sidebar, click the “Custom Fonts” tab and add the font family name. You should now be able to use the font in your Text elements.
(You may see a warning for now about the font not being available, which you can ignore.)
Using a font from a typeface file
Using a font from a typeface file requires coding.
If you have a typeface file in a format such as TrueType (.ttf), OpenType (.otf), Web Open Font Format (.woff, .woff2), etc,
your app will need to host it and load it with the @font-face CSS at-rule (MDN documentation).
First, set up an app host, then load the CSS before every page (this is framework-dependent).
Once you reload Plasmic Studio with the updated app host, on the left sidebar, click the “Custom Fonts” tab and add the font family name. You should now be able to use the font in your Text elements.
(You may see a warning for now about the font not being available, which you can ignore.)
Example with Next.js
Add the fonts to your global styles CSS (by default Next.js creates a styles/globals.css which is imported into _app.tsx so that the font is available throughout the app).
Make sure your _app.tsx is importing globals.css! (It may not be in your project.)
@font-face {font-family: 'My Custom Font';src:url('/fonts/MyCustomFont.woff2') format('woff2'),url('/fonts/MyCustomFont.woff') format('woff');font-weight: 400;font-style: normal;font-display: swap;}
import '../styles/globals.css';import type { AppProps } from 'next/app';export default function MyApp({ Component, pageProps }: AppProps) {return <Component {...pageProps} />;}
Example with Next.js and next/font
If you want to use next/font, such as next/font/local, to take advantage of Next.js’s font optimization features, the setup is currently a bit more complicated.
Because next/font generates random font-family names in JavaScript, we can’t rely on this in Plasmic Studio.
Here’s the workaround:
- Configure your new font with
next/font/local. - Include the
variableoption, so that Next.js generates a class that puts your new font in a CSS variable. - In
_app.tsx, set the CSS variable on<body>to ensure Plasmic Studio has access to the variable.
It’s the same thing if you are using next/font/google.
import type { AppProps } from 'next/app';import localFont from 'next/font/local';import * as React from 'react';const myCustomFont = localFont({src: '../fonts/MyCustomFont.woff2',weight: '400',style: 'normal',display: 'swap',variable: '--MyCustomFont'});export default function MyApp({ Component, pageProps }: AppProps) {// Set the CSS variable on <body> to ensure Plasmic Studio has access to the variable.React.useEffect(() => {document.body.classList.add(myCustomFont.variable);}, []);return <Component {...pageProps} />;}
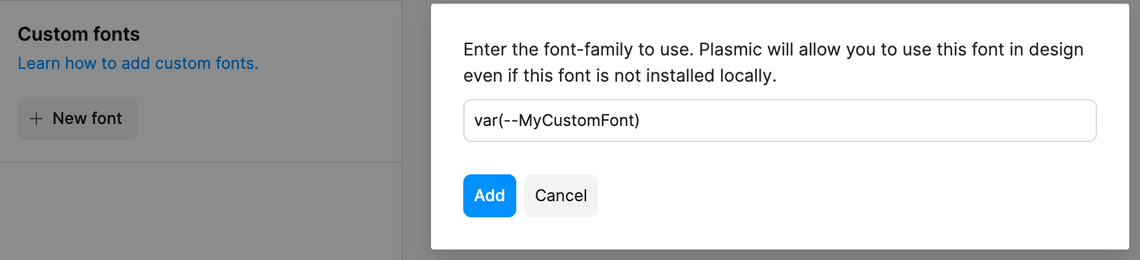
Finally, in Plasmic Studio, you can add your custom font with its CSS variable, like “var(—MyCustomFont)“.
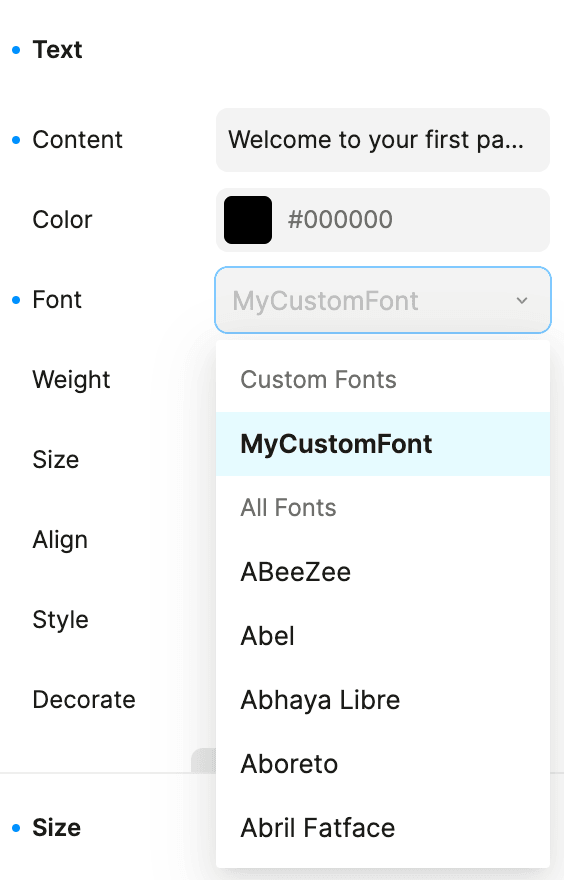
Now, when editing a text element and selecting a font, your custom font will display as “MyCustomFont”.
Custom fonts without codebase integration
Usually, if you have codebase integration, then it makes sense to reuse the font that your codebase is already providing, which is likely used in other pages that are built outside of Plasmic.
But you can also insert a Custom CSS Embed to provide custom fonts there. However, the font needs to be hosted somewhere. If it’s not already available from some URL, then you can also host it yourself using the Plasmic CMS which lets you host files.
To do this, perform the following.
-
(Optional—skip this step if your font is already hosted somewhere.) Create a Plasmic CMS, outside of your Plasmic project. Create a model called Fonts, with a single “file” field. Create a single entry of that model type, and upload your font file. Right-click the resulting link and copy its address, which you’ll need in a later step.
-
In your Plasmic project, insert a Custom CSS Embed.
-
Write something like this in it—let’s say the font is called TTInterfaces, and replace the URL with the URL to the font.
@font-face {font-family: 'TTInterfaces';src: url('https://site-assets.plasmic.app/0ddedcb007bd939cde58d5ad4ada1f1c.ttf');}
- In the left sidebar tab for Custom Fonts, add your font, TTInterfaces.
Repeat the above steps for each custom font and each variant of the font you need.