Supabase integration (deprecated)
You are viewing documentation about the legacy backend integrations feature. For new projects, use Supabase’s APIs instead of a direct database integration, or start from the Supabase integration guide.
Supabase is an open source Firebase alternative, based on PostgreSQL.
Plasmic currently integrates with Supabase Database and Supabase Storage.
Supabase Database
Plasmic makes a direct connection to the underlying PostgreSQL database. Therefore, in addition to this page, you can also refer to the PostgreSQL page for support.
Setup
To connect to Supabase Database, Plasmic needs a connection string to your database.
-
Go to Plasmic Studio and add a new integration. You can add a new integration from a project or from a workspace, like My Playground.
-
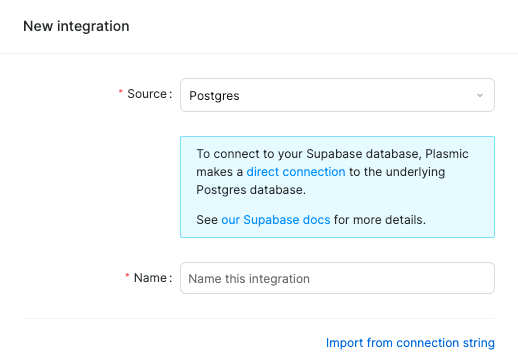
Choose “Supabase Database” or “Postgres” as the source, add a name, and click “Import from connection string”.
-
In another tab, log in to your Supabase dashboard and select your project.
-
Click the “Project Settings” icon on the left nav.
-
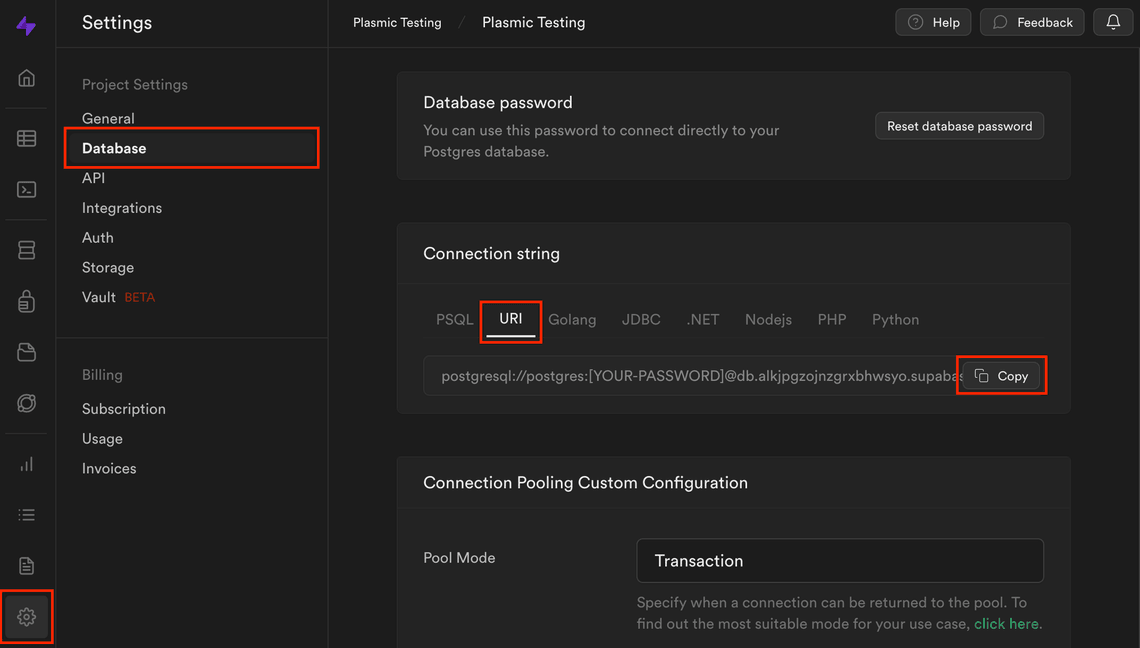
Click “Database” on the left panel.
-
Have your database password ready (hopefully you securely stored it somewhere). If you have it, move to the next step. If you don’t have it, you’ll need to reset it in the “Database password” section. Be careful, if you have other clients using the old password, they’ll stop working!
-
Scroll down to the “Connection string” section, click “URI”, and click “Copy”.
-
Go back to your Plasmic Studio tab, and paste the connection string in.
-
Replace
[YOUR-PASSWORD]with your database password. -
Click “Import” and “Confirm”, and you can start querying data from your Supabase database!
Your integration credentials will only be used on Plasmic servers and will never be exposed to clients. See the documentation on integration security for more details.
Plasmic and RLS
Supabase allows you to set Row Level Security (RLS) policies on tables, and it defaults to on. However, since Plasmic currently connects to Supabase with a direct connection, Plasmic is unable to use auth features and most RLS features. To query a table, you’ll need to make sure the table has RLS turned off or has a permissive RLS policy that enables read access for all users.
Troubleshooting
Query not returning any rows
- Check that your table has rows.
- Check that your query’s filters make sense.
- Check your table’s RLS policies. See Plasmic and RLS for more.
Supabase Storage
Plasmic lets you connect to a Supabase Storage bucket to upload images, videos, documents, or any other file type.
Setup
To connect to Supabase Storage:
-
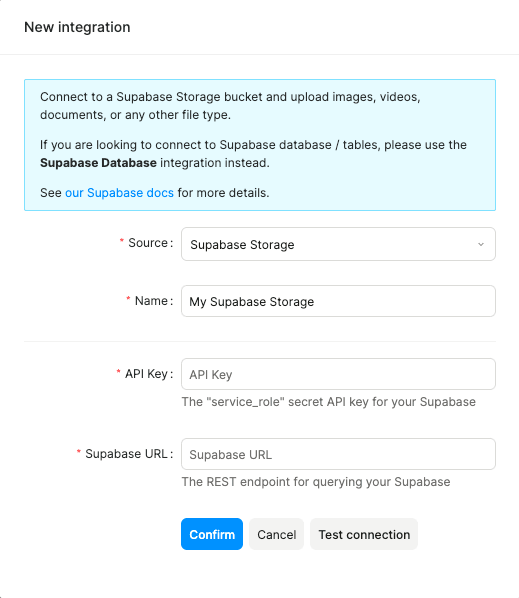
Add a new integration, choose “Supabase Storage” as the source, and set a name.
-
In another tab, log in to your Supabase dashboard and select your project.
-
Click the “Project Settings” icon on the left nav.
-
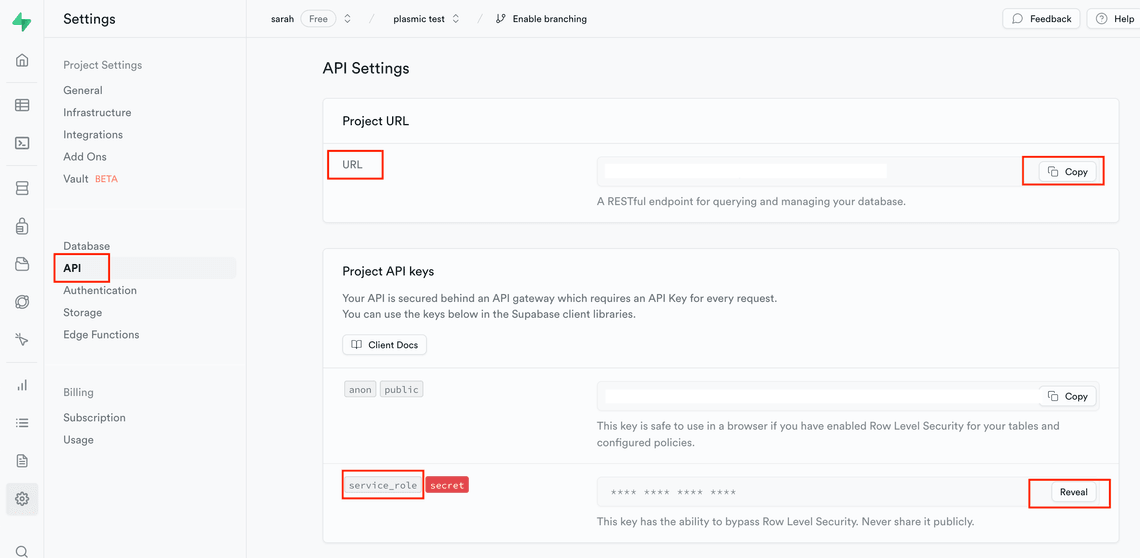
Click “API” on the left panel.
-
Under API Settings, find the Project URL and click “Copy”.
-
Go back to your Plasmic Studio tab, and paste the copied URL.
-
Go back to Supabase dashboard tab, find Project API keys, and click “Reveal” next to the “service_role” API key, then click “Copy” next to it.
-
Go back to your Plasmic Studio tab, and paste the copied service_role API Key.
-
Click “Confirm” in the New Integration modal, and you are all set to upload assets to your Supabase storage!
Uploading assets
The easiest way to upload assets (images, documents, etc) to the integrated Supabase storage is via the Upload component.
-
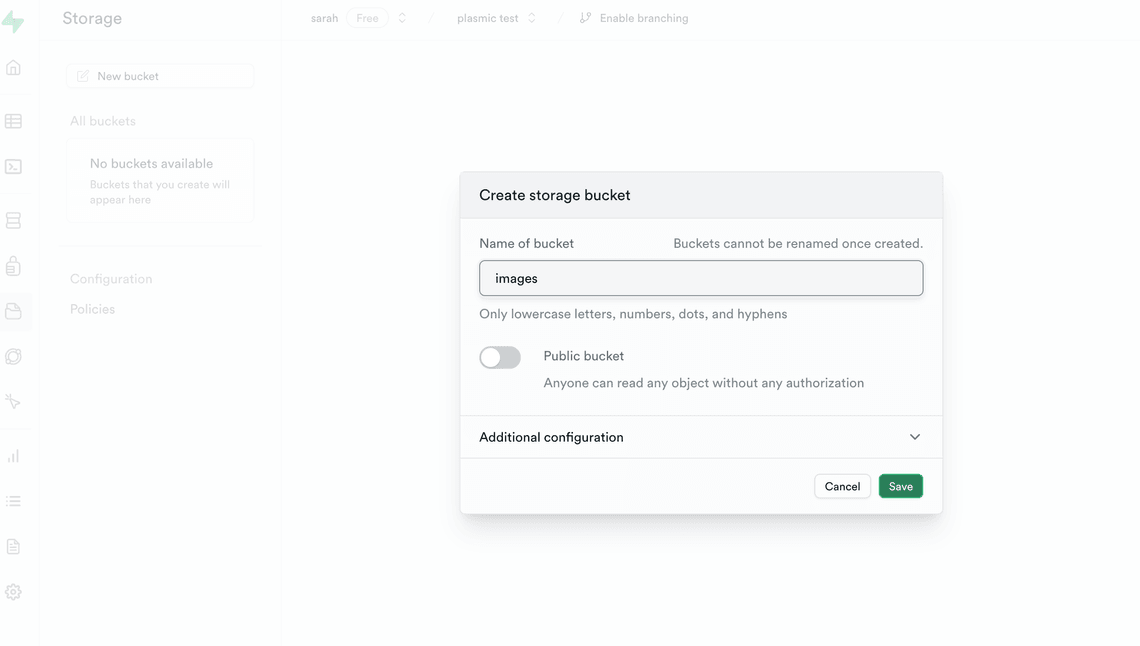
Create a bucket called “images” in your Supabase project.
-
Create the Supabase Storage integration in Plasmic Studio using the setup explained above.
-
Create a new project in Plasmic Studio.
-
Create a new page.
-
Toggle open the Add Drawer, add the
uuidCode Library. This library will help us give arbitrary names to uploaded assets.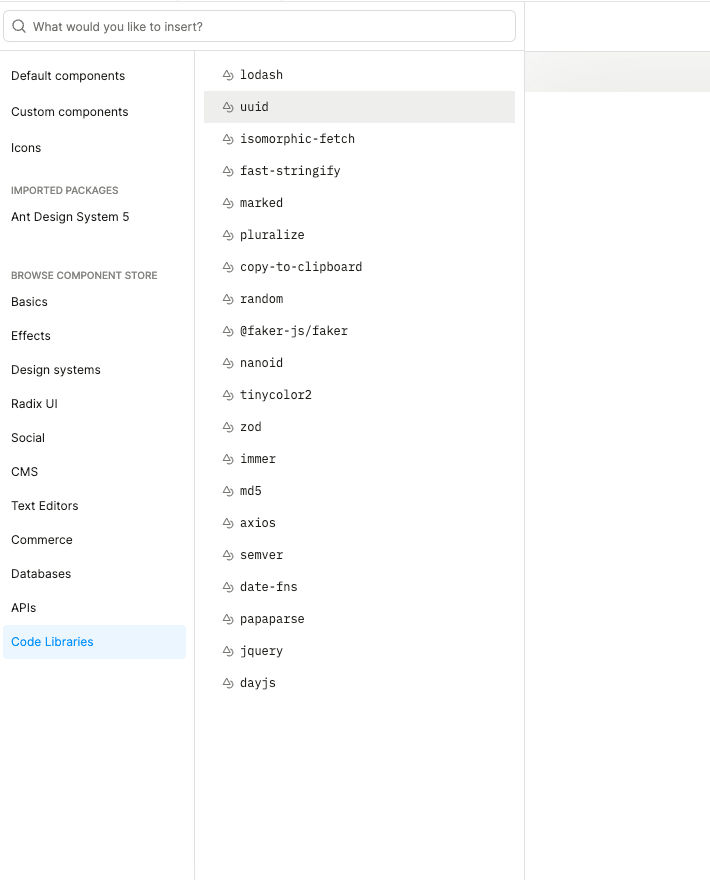
-
Also add the Upload component from Antd Design System 5 package in the Add Drawer. The Upload component exposes a
filesstate, that we will use in the next steps. You may turn on the Interactive Mode and see how “files” state changes when you upload a file via the Upload button.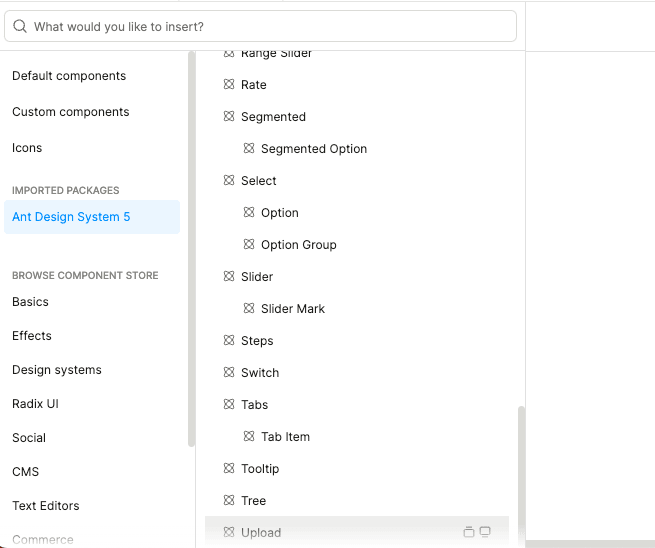
-
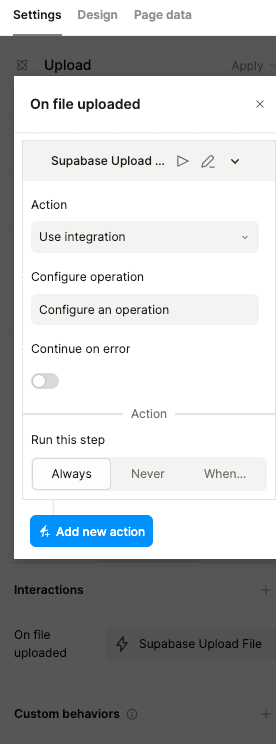
Configure the “On file uploaded” interaction of the Upload component. In the interaction modal, select the Use Integration action. Then click “Configure an operation” to choose the integration to use.
-
In the Configure Operation modal, set the following fields:
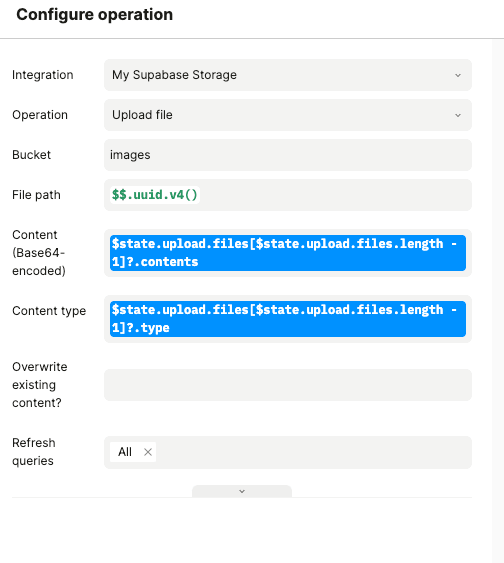
- Integration: Choose the integration that connects to the Storage in your Supabase project.
- Operation: Upload file
- Bucket: images
- File path: This is the path/name of the uploaded file. Give it a dynamic value of
$$.uuid.v4(), which generates a unique name for every uploaded file. - Content: Give a dynamic value
$state.upload.files[$state.upload.files.length - 1]?.contents. This uses the Upload button’s “files” state and retrieves the base64 contents of the last uploaded image. - Content type: Give a dynamic value
$state.upload.files[$state.upload.files.length - 1]?.type. This uses the Upload button’s “files” state and retrieves the MIME type of the last uploaded image.
- Click “Confirm” to save your changes, and you can start uploading files to your Supabase Storage bucket.